
Library Panels — the preview overviews
The LibraryPanels page of Preferences defines the preview
overviews shown in the Library's preview panel
(the right-hand side, and the per-dataset preview). Each Overview
is one preview page — a titled grid of result images. This is where you decide
which images appear in each overview, their captions, in which program modes the
overview is shown, and which images are combined for the overlay view. The
settings are stored in the project's overviews.ini.
The numbered markers on the screenshot point to each region; the legend explains them. The ? button at the top-right (just to the right of the mode-filter toggle) opens this page.
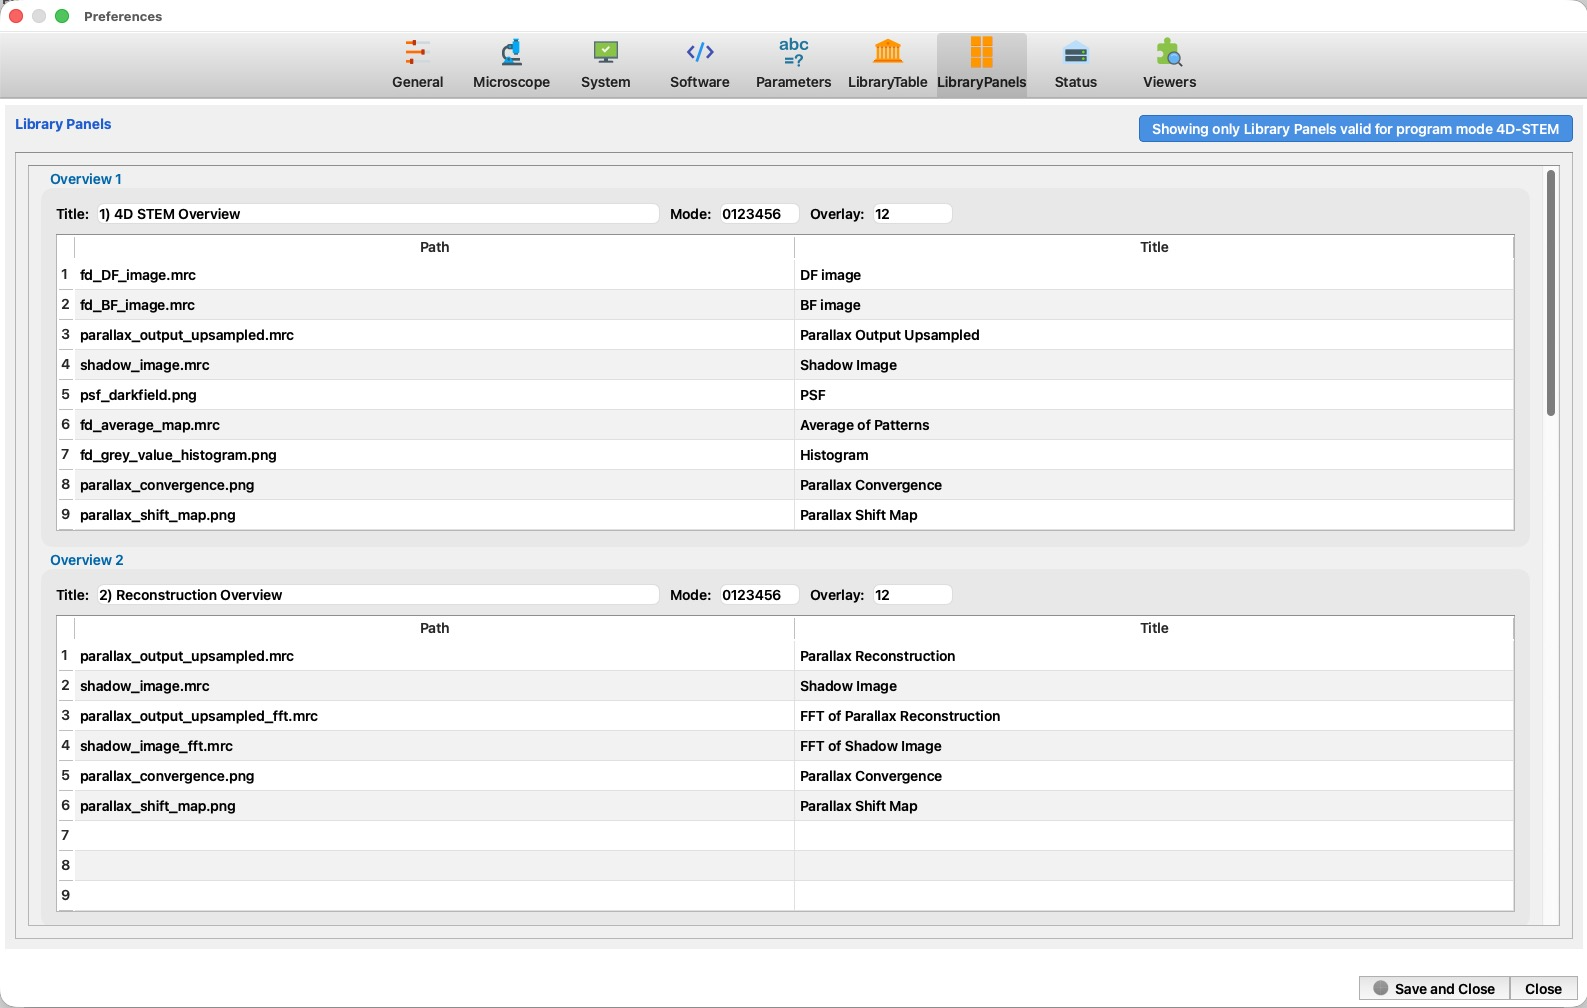 1
2
3
4
5
6
7
8
9
10
11
1
2
3
4
5
6
7
8
9
10
11
| # | Region / field | What it is and does |
|---|---|---|
| 1 | Preferences tabs | The nine Preferences pages; LibraryPanels is selected here. |
| 2 | Title | The panel title, "Library Panels." |
| 3 | Mode-filter toggle | "Showing only Library Panels valid for program mode …" — toggles between showing only the overviews used in the current program mode and showing all of them. The ? help button sits just to its right. |
| 4 | Overview N | One preview page. Each Overview becomes a titled tab/grid of images in the Library preview panel (e.g. "1) 4D STEM Overview"). |
| 5 | Title | The caption shown for this overview (the heading over its image grid). |
| 6 | Mode | The program-mode digits in which this overview is shown (e.g. 0123456). Leave a mode out to hide the overview in that mode. |
| 7 | Overlay | Which image slots are combined for the overlay view (e.g. 12 = slots 1 and 2), used when Activate Overlay is pressed in the Library preview. |
| 8 | Path column | The result-image filename shown in each slot (e.g. fd_DF_image.mrc, psf_darkfield.png). Up to nine slots per overview. |
| 9 | Title column | The caption shown under each image slot (e.g. DF image, PSF). |
| 10 | Next Overview | Further Overview blocks (Overview 2, 3, …) define additional preview pages; empty slots are left blank. |
| 11 | Save and Close / Close | Save and Close writes the overviews to overviews.ini; Close discards the changes. |
How it works
- Each Overview corresponds to one page of the Library preview panel. Fill each slot's Path with the filename of a result image that your processing scripts produce, and give it a Title caption.
- The Mode field decides in which program modes the overview appears; the Overlay field selects the slots blended by the Library preview's Activate Overlay button.
- Press Save and Close to write the layout; the Library preview refreshes to match. The images themselves come from running the processing scripts on a dataset.